The 3-Second Workflow: Send API Requests in Postmate Client (VS Code)
Once your project is set up — environments configured, data tables attached, collections organised — sending a fully parameterised API request to any environment with any test data takes exactly three steps.
No copy-paste. No editing request bodies. No switching files.
How It Works
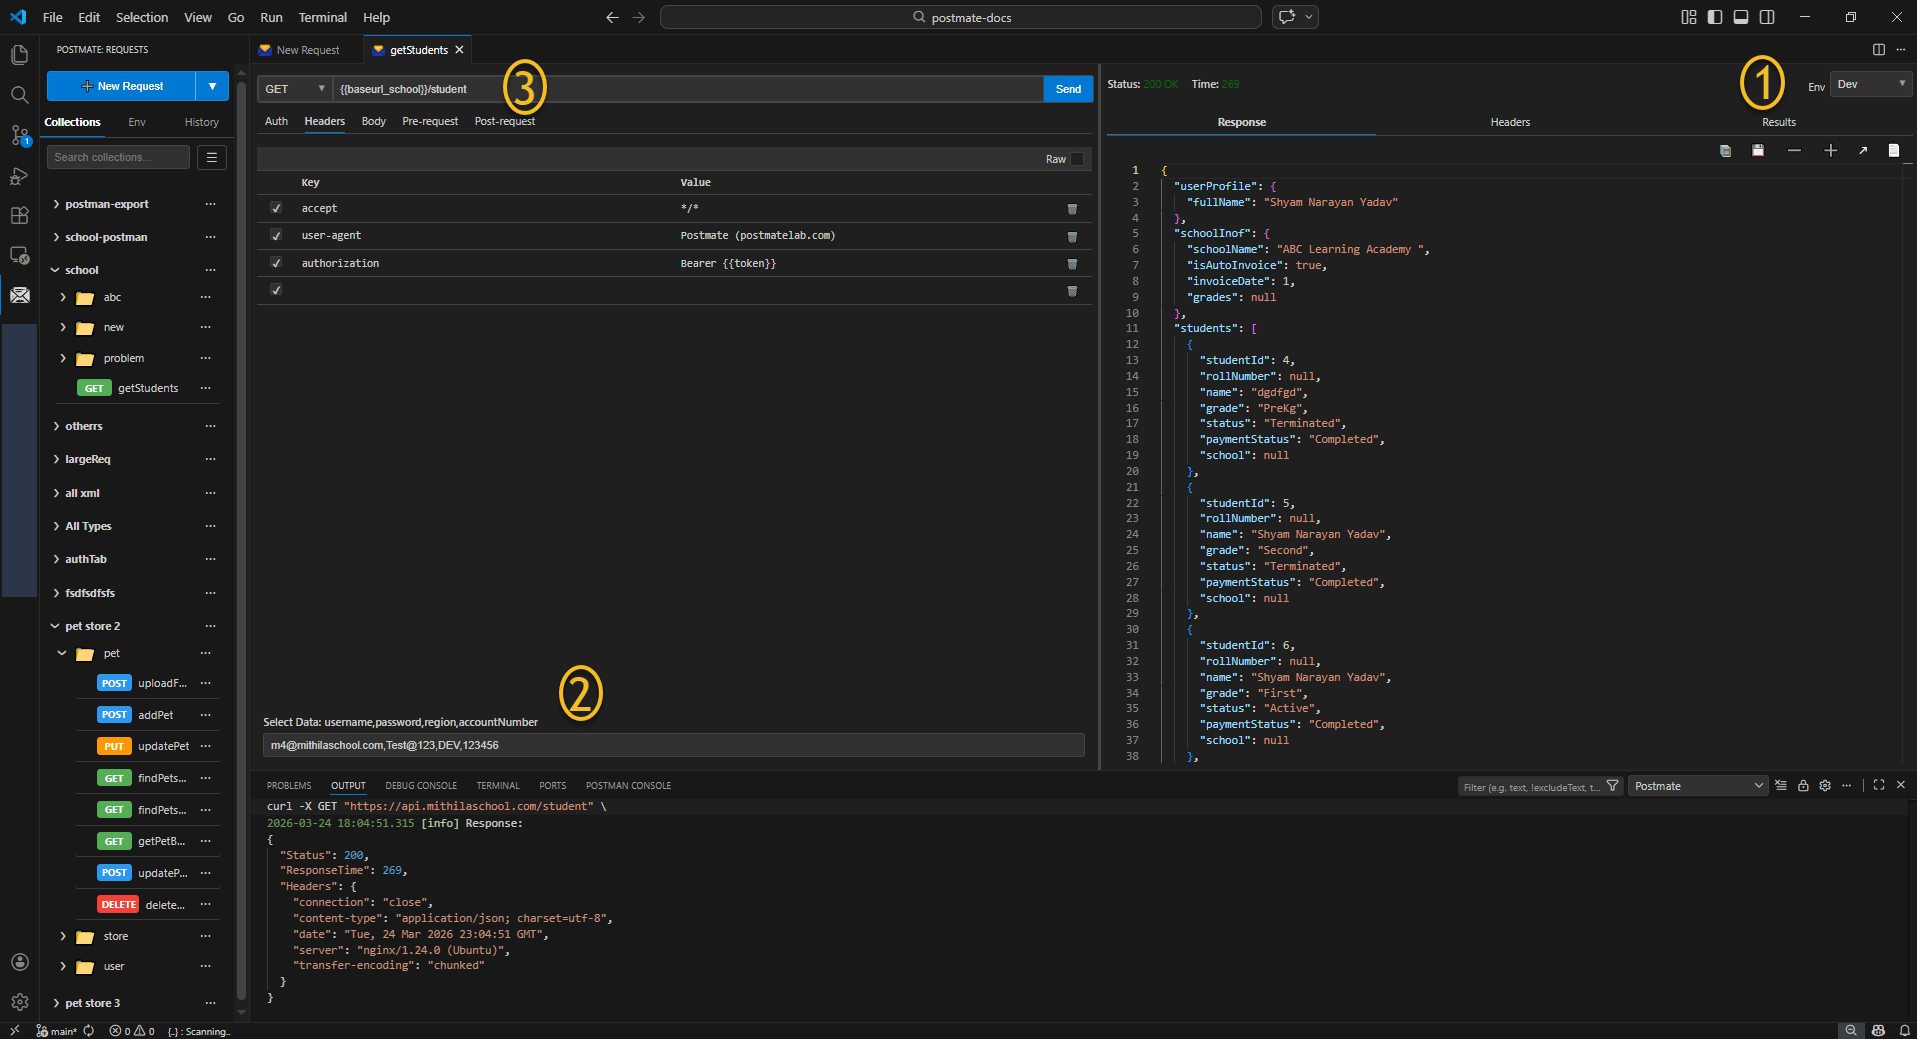
1. Select Your Environment
Choose the environment in Postmate Client where you want to run your API request. Every {{variable}} in your request URL, headers, and body is instantly resolved using that environment's values.
In the top-right corner of Postmate Client, open the Env dropdown and pick your target environment — Dev, Staging, Production, or any custom environment you've created.
{{baseUrl_school}}/student
→ https://api.dev.myschool.com/student   (Dev)
→ https://api.myschool.com/student       (Production)
2. Select Your Test Data
Below the request panel, open the Select Data dropdown. It automatically shows the data table rows attached to your active environment — no manual input needed. Pick a row from your data table to populate request parameters automatically, saving you manual input and reducing errors.
username,          password,    region,  accountNumber
[email protected],  Test@123,    DEV,     123456
[email protected],      Admin@456,   PROD,    789012
Postmate Client injects that row's values as variables into your request on the fly.
3. Click Send
Execute your fully parameterized API request in one click — no manual edits, no copy-paste.
Hit Send. That's it. Postmate Client fires the request with the correct base URL from your environment and the exact credentials and parameters from your selected data row — simultaneously, in one click.
Why This Matters
Without this workflow, testing across environments typically means:
- Manually editing the request URL to switch between dev and prod
- Copy-pasting credentials into the request body for each test case
- Keeping a separate spreadsheet of test users open on the side
With Postmate Client, all of that is replaced by two dropdowns and a button.
Setting It Up (One Time)
This workflow requires a little upfront setup — but you only do it once.
Step 1 — Create your environments
Go to Env → Manage Environments and create one environment per target (e.g. Dev, Staging, Production). Add your base URLs and shared variables to each.
See Environments & Variables for the full guide.
Step 2 — Create a data table and attach it to an environment
Go to the environment's Data Tables section, create a table, and add rows for each test user or data set. Attach the table to the environment.
See Data Tables for the full guide.
Step 3 — Use {{variables}} in your requests
Reference environment variables and data table columns in your request URL, headers, and body using {{variableName}} syntax.
See Variable Resolution for how values are resolved.
Ready to automate further?
Once your project is set up in Postmate Client, sending fully parameterized API requests across multiple environments is as simple as three clicks. No copy-paste, no manual edits, and zero switching between files or spreadsheets.
Try the Collection Runner — it iterates through every row in your data table automatically, running the full collection once per row with zero manual intervention and produce beautiful HTML and JSON report.