Data Tables in Postmate Client (Data-Driven API Testing in VS Code)
Run data-driven API testing in Visual Studio Code using Postmate Client. Data Tables let you parameterise API requests with CSV datasets, so you can test multiple scenarios with different inputs — without editing the request between runs.
Postmate Client is a privacy-first Postman alternative that keeps all your test data local. Data tables are plain .csv files stored on your machine, scoped per environment, and never synced to any cloud.
This makes Postmate Client ideal for data-driven API testing in VS Code — similar to Postman's Collection Runner with CSV data, but fully local, free, and login-free.
What is a Data Table in API Testing?
A Data Table is a structured dataset — stored as a CSV file — used to run API requests with multiple inputs.
- Each column = a variable name
- Each row = one test case
- Reference any column anywhere variables work, using
{{variableName}}
Example: an API test data table called test-users
| username | password | expectedStatus |
|---|---|---|
| [email protected] | pass123 | 200 |
| [email protected] | wrongpass | 401 |
| [email protected] | admin123 | 200 |
Perfect for:
- Login API testing with multiple credentials
- Negative and edge-case test scenarios
- Bulk API validation across realistic inputs
- Regression testing with environment-specific data
How to Create a Data Table
Postmate Client creates data tables as native .csv files inside VS Code — no proprietary format, no special editor.
Steps:
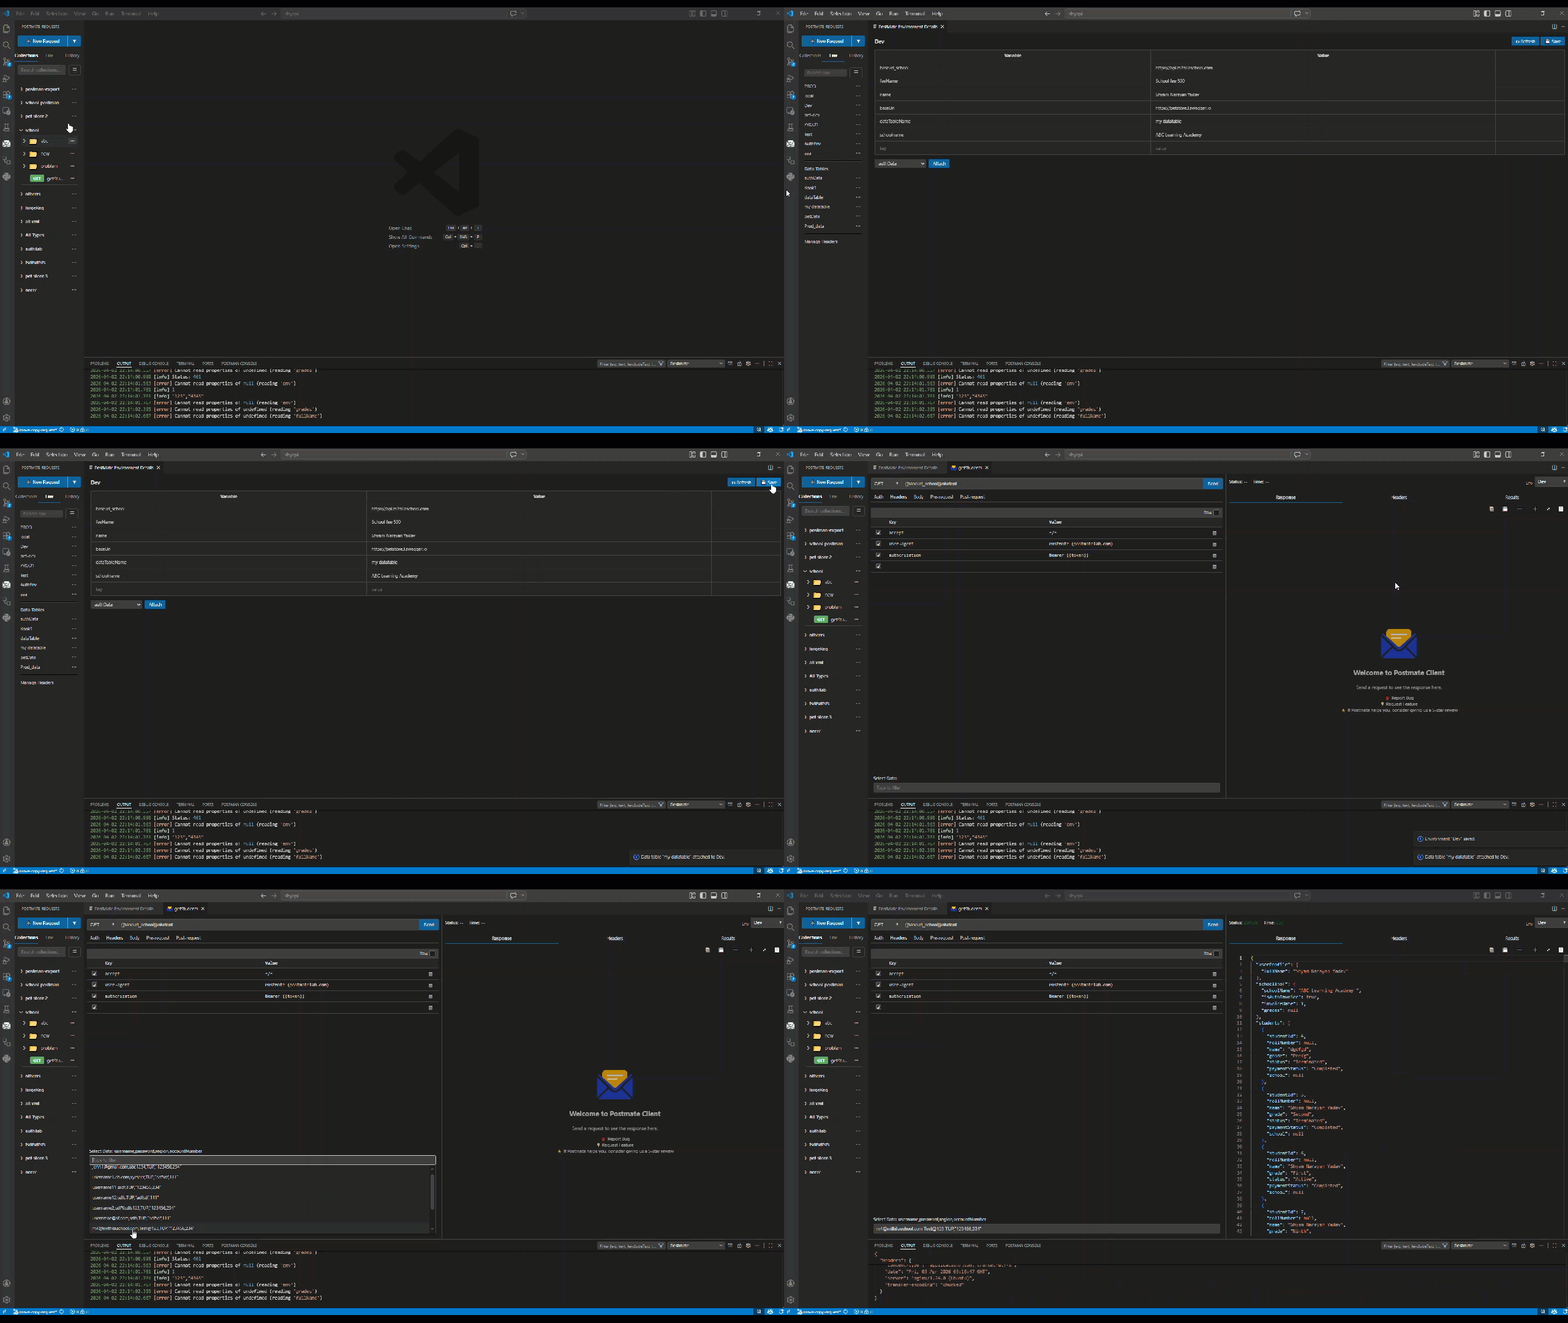
- Open the Env tab in the Postmate Client sidebar.
- Click the hamburger menu next to the search box.
- Select Create Data Table.
- Enter a name for the table and press Enter.
Postmate Client creates a new .csv file and opens it in VS Code's native editor. The new table also appears in the Data Tables list in the left panel.
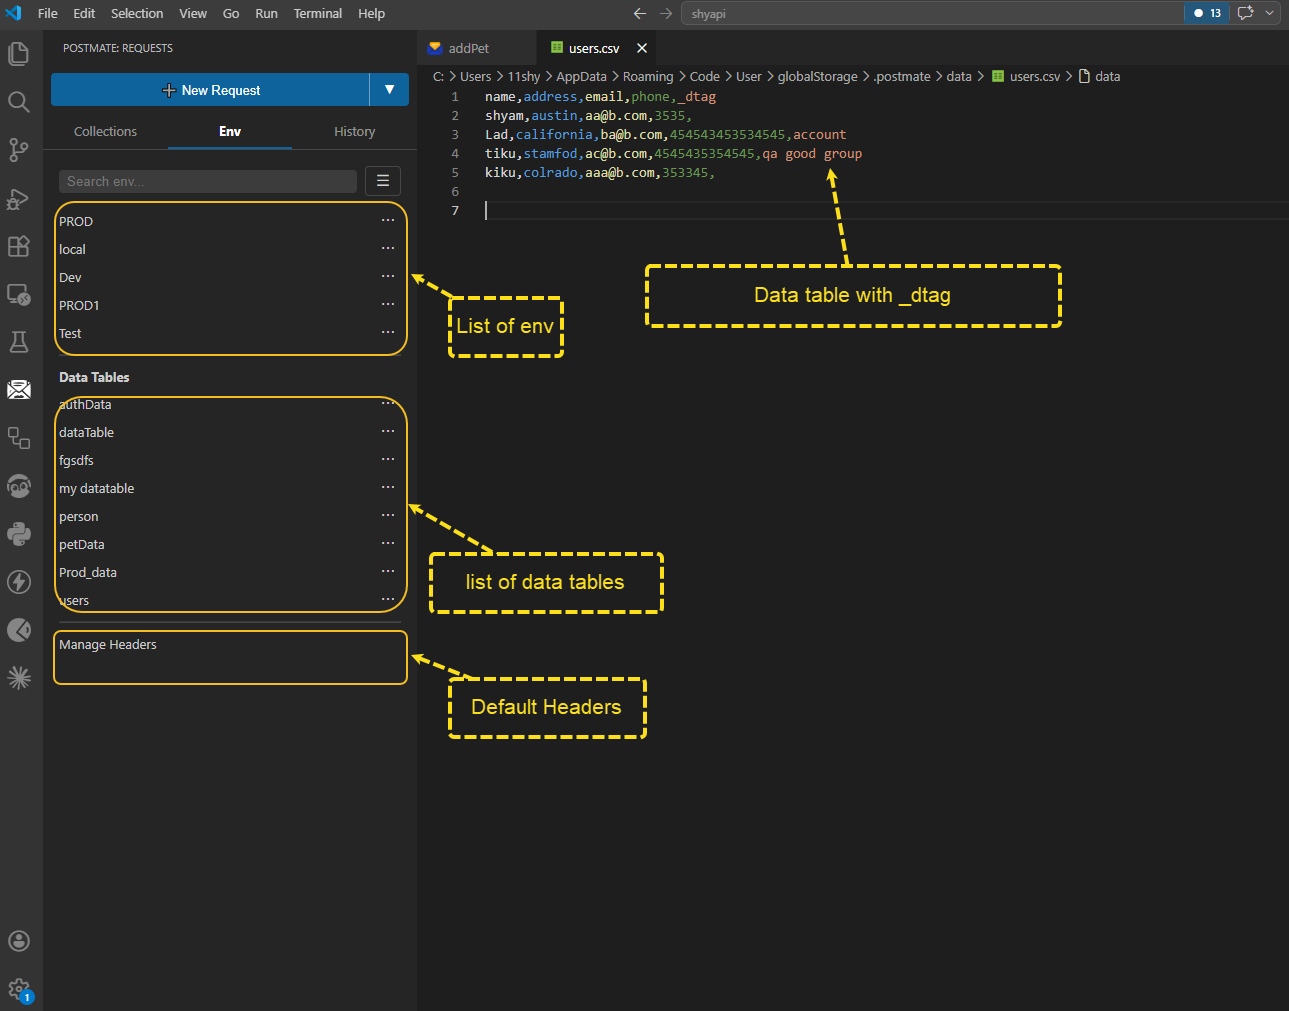
Now add your columns and rows. The first row of the file is the header (your column names), and every row after that is a test case.
name,address,email,phone
shyam,austin,[email protected],3535
Lad,california,[email protected],454543534545
tiku,stamford,[email protected],4545435435
TIP
The first row must be a header row. Without column names in the first row, Postmate Client cannot map values to {{variable}} references in your requests.
CSV Format Rules
Because data tables are plain CSV files, standard CSV rules apply. The most common gotcha:
Values containing commas must be wrapped in double quotes.
name,address
Alice,"123 Main St, Austin"
Bob,456 Pine Ave
Without the quotes, 123 Main St, Austin would be split into two columns. With the quotes, it stays as one value across the entire row.
Other CSV essentials:
- Header row required — first row defines column names
- One row per test case — newlines separate rows
- Quote anything with commas, quotes, or newlines —
"abc, xyz","he said ""hi""" - Quoting also controls data types — quoted values are sent as strings, unquoted numbers as numbers. See Data Types in CSV Values below.
- No empty header cells — every column needs a name
- Reserved column name —
_dtagis reserved for Data Tagging
TIP
Some users pair Postmate Client with the rainbow-csv VS Code extension for colour-coded CSV columns while editing. It is purely a visual aid — Postmate Client does not require any plugins to read or write data tables.
Data Types in CSV Values (Numbers, Strings, and Arrays)
When you select a data row and send a request, Postmate Client infers the data type of each value from how it is written in the CSV:
| Value in CSV | Sent in request body as | Type |
|---|---|---|
123 | 123 | number |
"123" | "123" | string |
hello | "hello" | string |
"123,101" | [123, 101] | array of numbers |
"""123"",""101""" | ["123", "101"] | array of strings |
The rules:
- Unquoted numeric values become numbers.
123is sent as the number123. - Quoted values always stay strings. Wrap a value in double quotes to prevent number conversion — essential for zip codes, phone numbers, and IDs with leading zeros (
"00042"is sent as"00042", not42). - Quoted values containing commas become arrays.
"123,101"is sent as[123, 101]. Each element is type-inferred individually — quote an element (escaped as""123""in the raw file) to keep it a string.
TIP
If you edit data tables in Excel or Google Sheets, the escaping is handled for you. To send an array of strings, type "123","101" in the cell — the doubled-quote form ("""123"",""101""") is written to the file automatically on save.
Example:
email,password,studentId,studentIds
[email protected],Test@123,"123","456,789"
produces this request body:
{
  "email": "[email protected]",
  "password": "Test@123",
  "studentId": "123",
  "studentIds": [456, 789]
}
How to Attach a Data Table to an Environment
Creating a table is step one. To use it in requests, attach it to an environment.
Steps:
- Open the Env tab in the sidebar.
- Open the environment you want to attach the table to (e.g. Dev).
- At the bottom of the environment editor, select the data table from the dropdown.
- Click Attach.
A new dataTableName entry appears in the environment, recording the attachment.
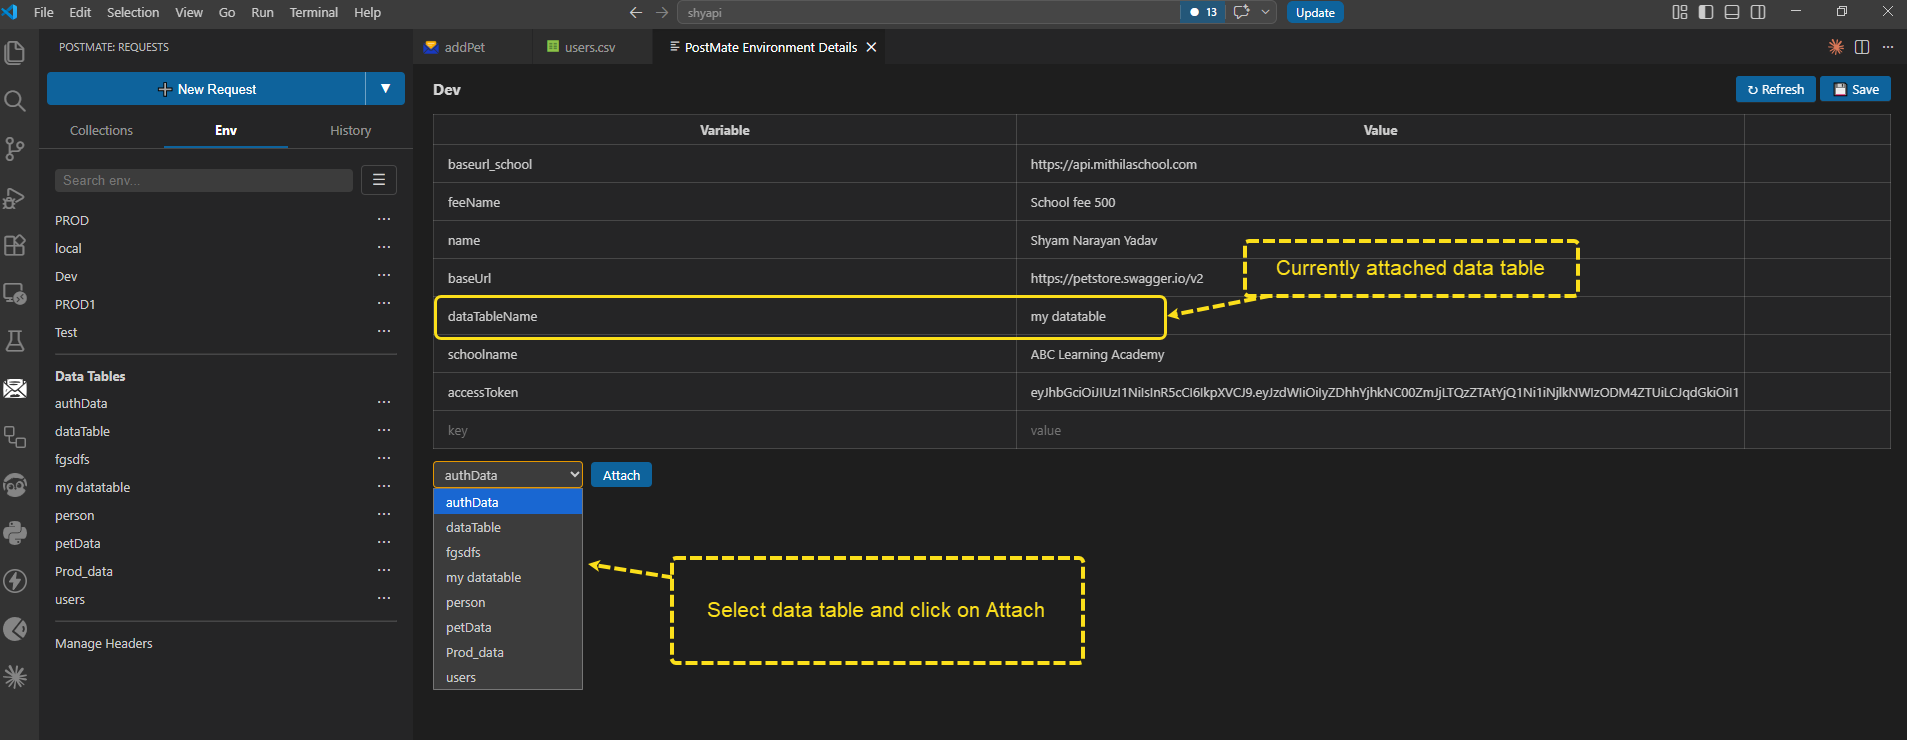
Once attached:
- The table is linked to that environment until you detach it
- Switching environments automatically switches the active data table
- The attachment persists across VS Code sessions
- No need to re-select the table every time you send a request
How to Detach a Data Table
To remove the link between a data table and an environment, delete the dataTableName entry from the environment editor and save. The table itself is not deleted — only the link is removed. The CSV file stays on disk and is still available to attach to any other environment.
Environment-Scoped Data Tables
Unlike most API tools, Postmate Client makes data tables environment-scoped. Each environment can have its own attached table, so:
- Dev can use
dev-users.csvwith safe test accounts - Staging can use
staging-customers.csvwith realistic but anonymised data - Production can use
prod-readonly.csvwith non-destructive scenarios
When you switch environments using the Env dropdown in the request panel, the active data table switches automatically. No reconfiguration, no risk of accidentally running staging data against production.
This is ideal for:
- Environment-specific testing
- Safe production validation
- Clean separation of test data per stage
- Teams sharing data tables through Git while keeping per-environment scope
Using Data Tables in API Requests
Once a data table is attached to the active environment, reference any column using standard variable syntax — exactly like an environment variable:
POST {{baseUrl}}/auth/login
Content-Type: application/json

{
  "email":    "{{username}}",
  "password": "{{password}}"
}
To run a request with a specific row:
- Select the environment in the Env dropdown.
- At the bottom of the request panel, pick a row from the Select Data dropdown.
- Click Send.
Postmate Client substitutes the row's values into every {{variable}} reference at send time. Change the row, click Send again — you have just run the same request against different inputs without touching the request configuration.
This is the 3-second workflow: pick environment, pick data row, click Send.
Filtering Rows with Data Tagging
For large data tables — hundreds or thousands of rows — you can filter which rows appear in a request's Select Data dropdown using data tagging.
Add a _dtag column to your CSV, tag rows with one or more space-separated tags, and select tags in the request's Settings tab. Only rows that match a selected tag will be available to that request — perfect for keeping account-related rows scoped to account requests, payment rows scoped to payment requests, and so on.
→ See Data Tagging for the full guide.
Run All Rows with Collection Runner
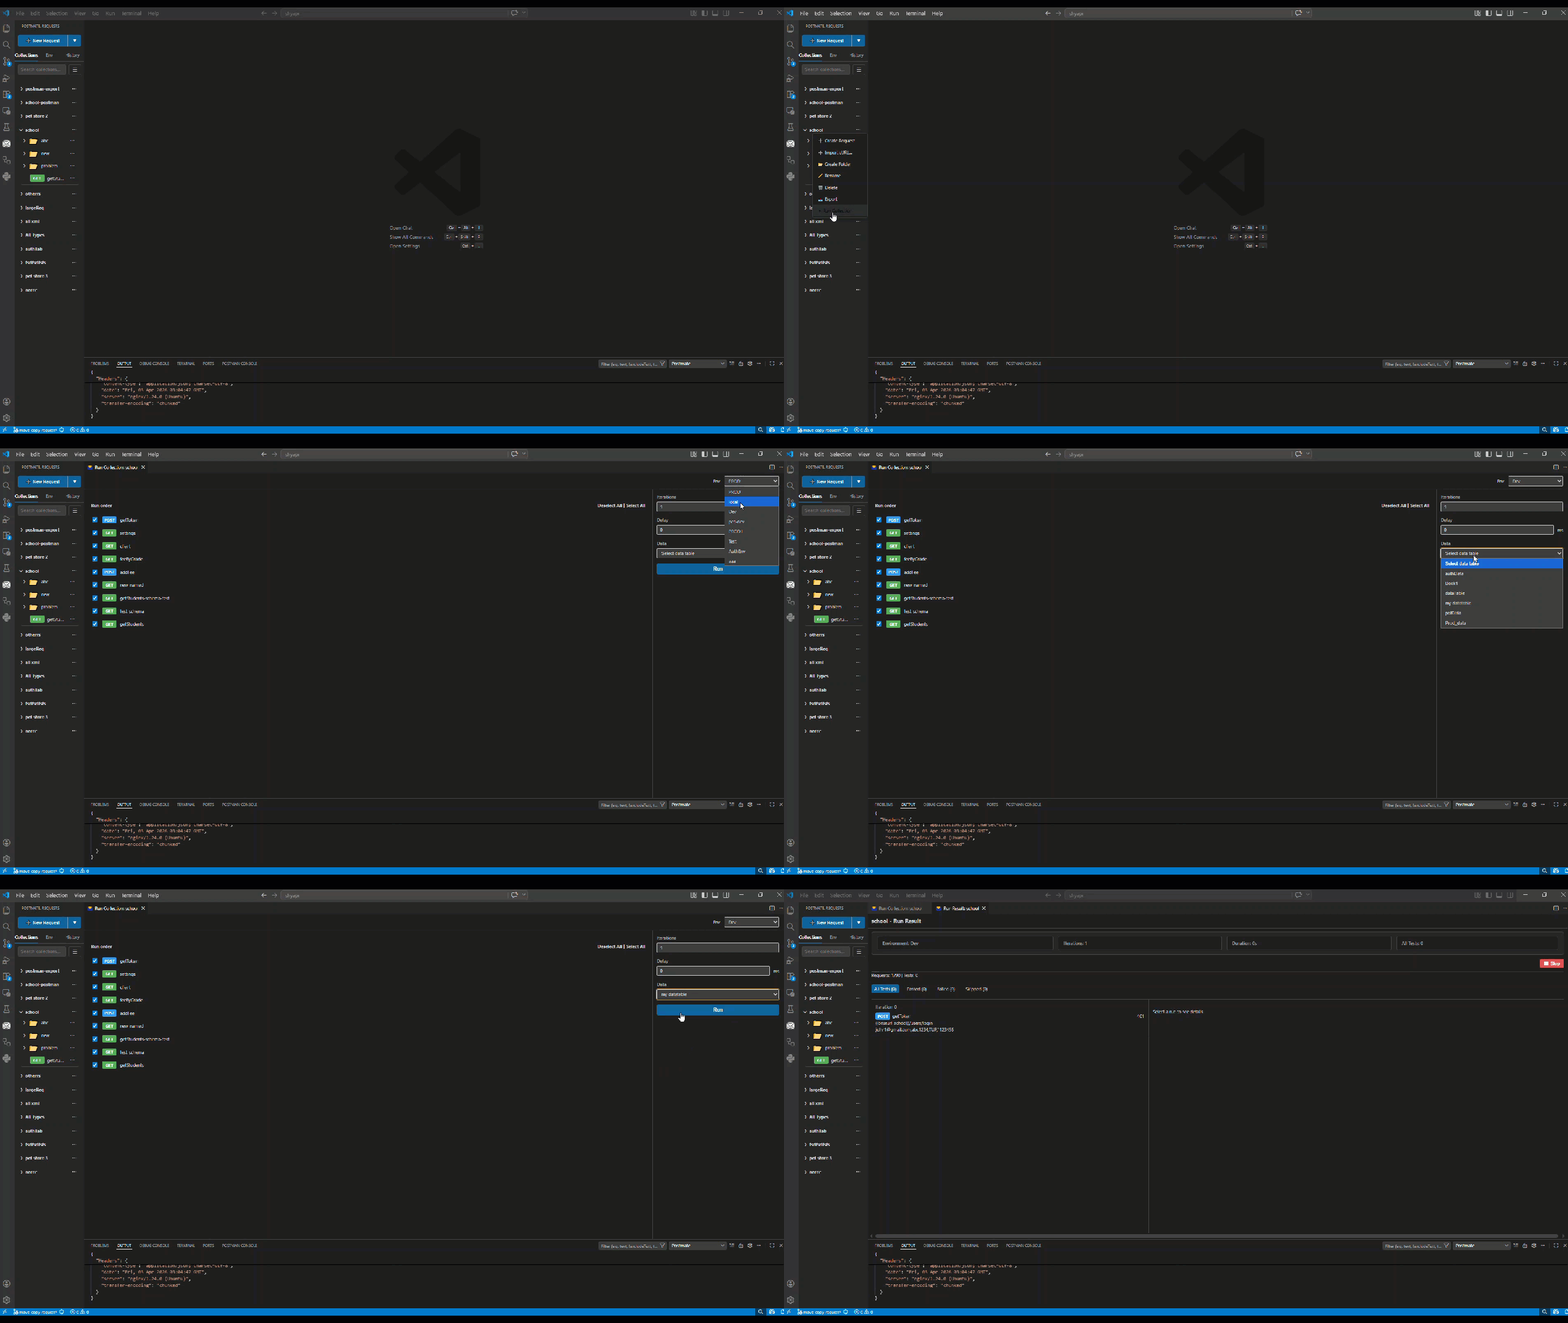
For data-driven test automation, use the Collection Runner to execute API tests across every row in the attached data table automatically.
- Iterates through each row in order
- Runs the full request flow for each row (including pre-request scripts and post-request tests)
- Generates pass/fail results per row
- Produces an HTML or JSON report for the entire run
Ideal for:
- Automated API testing in CI/CD
- Regression testing across realistic inputs
- Bulk validation before a release
- Reproducing a customer-reported issue across multiple accounts
→ See Collection Runner for the full guide.
Import CSV for API Testing
Already have test data in a CSV file from another tool, a spreadsheet, or a database export?
You can use it directly — Postmate Client data tables are CSV files. The simplest workflow:
- Create a new data table (Env tab → hamburger menu → Create Data Table)
- Open the generated
.csvfile in VS Code - Paste your existing CSV content over it, or replace the file contents entirely
- Save
The table is immediately available to attach to any environment.
Key Behaviours
- Unlimited tables — create as many tables as your project needs, with no row or column limits.
- Environment-scoped — each table is attached to one environment at a time; switching environments switches the active table.
- Persistent attachments — once a table is linked to an environment, it stays linked across sessions.
- Native CSV format — tables are plain
.csvfiles you can edit in VS Code, share via Git, and process with any external tool. - Works anywhere variables work — reference
{{columnName}}in URLs, headers, request bodies, auth tokens, and test scripts. - Local-only — data tables never leave your machine. No cloud sync, no telemetry.
- Optional tagging — use a
_dtagcolumn to scope rows to specific requests. See Data Tagging.
Tips for Data-Driven API Testing
- Name tables for purpose, not environment —
users,accounts,paymentsages better thandev-users-v2, since the environment scope is handled by the attachment, not the filename. - Keep one table per concern — a table per resource type (users, orders, products) is easier to maintain than one giant table covering everything.
- Commit tables to Git — since they are plain CSV files, your data tables version-control naturally alongside your code. PR reviewers can see exactly what test inputs changed.
- Quote anything risky — addresses, JSON snippets, full names with commas — wrap in double quotes to be safe.
- Quote values that must stay strings — phone numbers, zip codes, and IDs with leading zeros should be wrapped in double quotes to prevent automatic number conversion. See Data Types in CSV Values.
- Use tags for large tables — once a table grows past ~50 rows, add a
_dtagcolumn to keep the request-side dropdown manageable. See Data Tagging.
Frequently Asked Questions
What format does Postmate Client use for data tables? Standard CSV files. There is no proprietary format — data tables are .csv files on your local disk that you can edit in VS Code, open in Excel, process with scripts, or commit to Git.
Where are data tables stored? On your local machine, inside Postmate Client's data folder (under your VS Code user storage). Nothing is synced to any cloud or external service.
Can I attach the same data table to multiple environments? Yes. Attach the same CSV to Dev, Staging, and Prod if you want them to share the same test inputs. Or attach different tables for environment-specific data.
Can I filter which rows are used for a specific request? Yes. Use Data Tagging to add a _dtag column to your CSV and select tags on a per-request basis. Only matching rows will be available to that request.
Can I run an API test against every row in a data table? Yes. Use the Collection Runner to iterate the entire attached data table and produce pass/fail results per row.
Does Postmate Client support CSV files with commas inside values? Yes. Standard CSV quoting rules apply — wrap any value containing a comma, quote, or newline in double quotes. See the CSV Format Rules section above.
How do I keep a numeric value as a string (e.g. a zip code or ID)? Wrap it in double quotes in the CSV. Unquoted 78701 is sent as the number 78701; quoted "78701" is sent as the string "78701". Quoted values containing commas are sent as arrays. See Data Types in CSV Values.
Is data-driven testing in Postmate Client free? Yes. Every data-driven testing feature — unlimited data tables, environment scoping, Collection Runner, tagging — is free forever. No paid tiers.
Why Use Data Tables in Postmate Client?
If you are looking for:
- A Postman alternative for data-driven API testing in VS Code
- Local-first API testing with no cloud sync
- Better handling of test data across environments
- A free, login-free way to run parameterised API tests
Data Tables give you a clean, scalable way to manage API test inputs — and Data Tagging gives you precise control over which rows are used where.
Learn More
- Data Tagging — filter data table rows by tag, per request
- Collection Runner — run a request across every row automatically
- Environments & Variables — manage values per environment
- Building Requests — the full request panel reference
- The 3-Second Workflow — pick env, pick row, send